Neyl-dizayn "Rain drops" (+ step-by-step photos)
And now we will start design which we called "Rain drops".
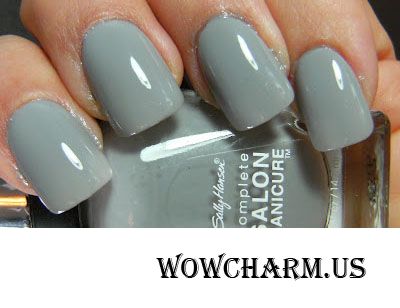
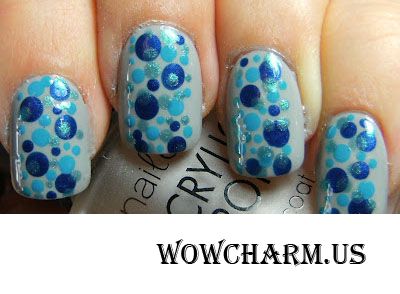
Step 1. We perform usual operations. At first a layer of a basic covering for protection of nails and strengthening of varnish, but two layers of background nail varnish are possible and just. At us is – a good light gray shade, low-transparent and not super glossy.
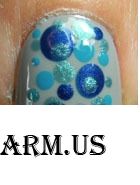
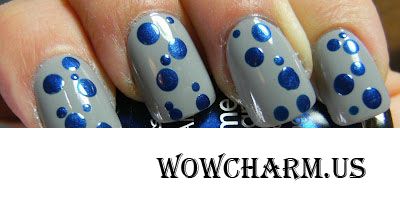
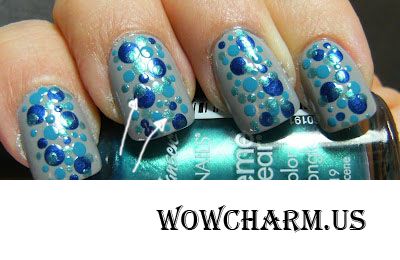
Step 2. The first layer of points. At us it is dark blue points. Big points became a tip of a thick knitting needle. That is, if the eraser which is not used up, and still new, then its semicircular tip very much is suitable for such works. For small points my tool was suitable for drawing of points.
Step 3. We do a layer of blue points. They have to be the different size on our idea too. Two different diameters were enough for me, these are two ends of my tool for making of points.
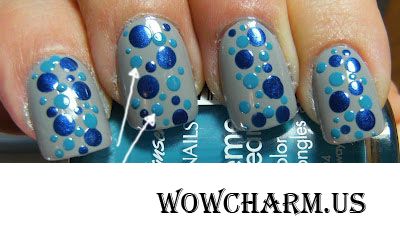
Step 4. The last layer of points can be done by points of one diameter, the smallest. For the last layer varnish with a shimmer is chosen, he creates special conviviality and tridimensionality. At the same time points can come on the drawn earlier larger circles.
Step 5. The last stroke – top coat. Though I heard opinion from many girls that some relief on nails which is created at neyl-design, this relief very much is pleasant to them. If so if you like such multiple layers – it is possible nails the top covering and not to paint. But I do it always, and not because I do not like dimensions, and just because learned by the experience that with the top covering varnish really keeps longer and remains bright and not shabby.
It is ready!
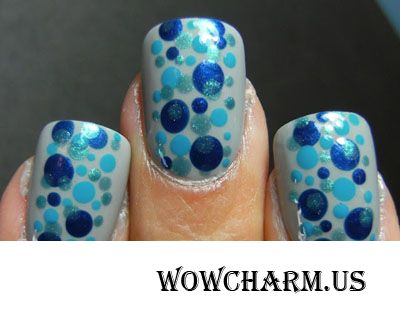
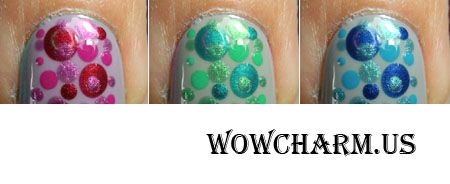
Variations at such design as you understand, - a set! Invent new color schemes and also new graphic options (points can evenly be located on a nail, can – chaotically, can block each other, can be rare or frequent, etc.).
And now the promised bonus.
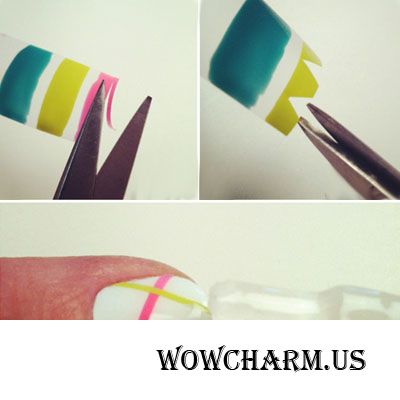
Found in the byyuti-blog thebeautydepartment.com. It is possible to make color stickers in the form of strips, triangles and squares. For this purpose we take a usual office adhesive tape. Then we paint over color varnishes small sites of an adhesive tape.

We cut geometrical figures necessary to us: rombik, strips, triangles, etc. We paste on nails and surely we fix by the top covering. Accurately and without defects!
Try! Good luck!
Photo: thebeautydepartment.com, Deez-Nails.com
Copy the code and insert into a window of creation of record on LiveInternet, previously having included the Source mode there.
HTML-code: 
|
|
| The BB code for forums: |
How will it look?
wowcharm.us → Neyl-dizayn "Rain drops" (+ step-by-step photos)
|
Do you remember, I advised you to get special tools for drawing of points and peas of ideal round shape? But if you do not have these objects yet, it does not mean that design of nails with points not for you. Try and experiment! As an alternative the mentioned tools will be suited: hairpins, pins with a ball on the end, a ball pen, a usual knitting needle... Read more: |
| "How To manicure: neyl-design "Uzbek cotton" | | | Safe alternative to classical nail extension" |
|
Other discussed materials:
I recommend all this meat dish for a holiday table!
Turn
Pokhvalyushka. A prize for the competition "My New Year's Adventures"
We wish our Olesya Olesya 7777 happy birthday!
|


